Exaile 3.0.1 was released on 6 September and it is a bugfix for the stable 3.0 series. To get it in Ubuntu Jaunty, follow the steps below:
Edit /etc/apt/sources.list and add the following two lines (the second one is needed only if you want the sources too):
deb http://ppa.launchpad.net/exaile-devel/ppa/ubuntu jaunty main
deb-src http://ppa.launchpad.net/exaile-devel/ppa/ubuntu jaunty main
Make sure to save the file and add the trusted key:
sudo apt-key adv --keyserver keyserver.ubuntu.com --recv-keys 43CBFCC0
Next, update the source packages:
sudo apt-get update
To install Exaile 3.0.1, issue the following command in a terminal application:
sudo apt-get install exaile
This should be all. Run Exaile by typing Alt+F2 and entering exaile in the run box that appears.
Showing posts with label jaunty. Show all posts
Showing posts with label jaunty. Show all posts
Friday, 11 September 2009

Sunday, 6 September 2009
How-To: Install Amarok 2.2 Beta 1 from the Kubuntu Beta Backports

The first beta of Amarok 2.2, codenamed 'Crystal Clear', was released on September 4 and packages are available for Kubuntu 9.04 Jaunty from the Kubuntu Beta Backports.
Amarok 2.2 Beta 1 comes with a huge number of bug fixes and many improvements and new features. To list some of them:
- new videoclip applet
- new photo applet
- improved browser layout to the left
- widgets can now be arranged differently from default
- ratings
- support for audio CDs
- the playlist offers multi-level sorting now
Those are only the highlights though, to see the full announcement and changelog read this.
To install Amarok 2.2 Beta 1 in Kubuntu/Ubuntu 9.04 Jaunty Jackalope just follow the instructions below:
First, edit the /etc/apt/sources.list file with your favourite text editor, e.g.:
sudo nano /etc/apt/sources.list
Or:
kdesudo kate /etc/apt/sources.list
Next, add the following two lines:
deb http://ppa.launchpad.net/kubuntu-ppa/beta/ubuntu karmic main
deb-src http://ppa.launchpad.net/kubuntu-ppa/beta/ubuntu karmic main
Make sure to save the file and then add the trusted key for this repository:
sudo apt-key adv --keyserver keyserver.ubuntu.com --recv-keys 8AC93F7A
Now update your package lists:
sudo apt-get update
Eventually, remove your existing Amarok installation:
sudo apt-get remove --purge amarok
sudo apt-get autoremove --purge
And now install the latest Amarok:
sudo apt-get install amarok
This should be all. Run Amarok 2.2 Beta 1 by pressing Alt+F2 and typing amarok in KRunner.
Saturday, 5 September 2009
How-To: Install OpenOffice.org 3.1.1 in Ubuntu 9.04 Jaunty Jackalope
OpenOffice.org 3.1.1 was released a few days ago, bringing many bug fixes to the stable 3.1 series. One of the ways to get it on Jaunty is to use the Launchpad.net PPA for OpenOffice.org Scribblers which recently packaged it for Ubuntu Jaunty and included it in their repositories.
To install the latest release using command-line, just use the instructions below:
First, edit the /etc/apt/sources.list file and enter your user password:
sudo nano /etc/apt/sources.list
Add the following two lines (the second one is not necessary, unless you want the sources to be available too):
deb http://ppa.launchpad.net/openoffice-pkgs/ppa/ubuntu jaunty main
deb-src http://ppa.launchpad.net/openoffice-pkgs/ppa/ubuntu jaunty main
Add the trusted key for these repositories:
sudo apt-key adv --keyserver keyserver.ubuntu.com --recv-keys 247D1CFF
Update the packages lists:
sudo apt-get update
You can eventually remove your existing OpenOffice installation by using the following two commands:
sudo apt-get remove --purge openoffice.org
sudo apt-get autoremove --purge
This will also remove system-wide configuration files.
Now, install OpenOffice.org 3.1.1:
sudo apt-get install openoffice.org
This should be all. You can run it by pressing Alt+F2 and typing openoffice in the run box.
To install the latest release using command-line, just use the instructions below:
First, edit the /etc/apt/sources.list file and enter your user password:
sudo nano /etc/apt/sources.list
Add the following two lines (the second one is not necessary, unless you want the sources to be available too):
deb http://ppa.launchpad.net/openoffice-pkgs/ppa/ubuntu jaunty main
deb-src http://ppa.launchpad.net/openoffice-pkgs/ppa/ubuntu jaunty main
Add the trusted key for these repositories:
sudo apt-key adv --keyserver keyserver.ubuntu.com --recv-keys 247D1CFF
Update the packages lists:
sudo apt-get update
You can eventually remove your existing OpenOffice installation by using the following two commands:
sudo apt-get remove --purge openoffice.org
sudo apt-get autoremove --purge
This will also remove system-wide configuration files.
Now, install OpenOffice.org 3.1.1:
sudo apt-get install openoffice.org
This should be all. You can run it by pressing Alt+F2 and typing openoffice in the run box.
Monday, 24 August 2009
How-To: Install Pidgin 2.6.1 in Ubuntu 9.04 Jaunty from a Launchpad PPA
Pidgin 2.6.0 was made available a few days ago, on August 19, 2009, and today Pidgin 2.6.1 was released as a bug fix version to the new stable 2.6 series. Among the features and improvements which come with 2.6.0 are:
- several changes and bug fixes in libpurple, the library used by Pidgin for its various chat protocols
- various DNS fixes
- AIM and ICQ fixes
- Gadu-Gadu fixes
- MSN new features, like support for receiving audio clips, support for receiving handwritten messages, many other fixes
- lots of XMPP fixes and improvements, like voice and video support with Jingle or the Service Discovery Browser plugin
- Yahoo! fixes and improvements
- Finch and the Pidgin GTK+ Theme control plugin also received improvements
To install Pidgin 2.6.1 in Ubuntu 9.04 Jaunty Jackalope from the Pidgin developers PPA on Launchpad, just follow the instructions below:
First of all, edit the /etc/apt/sources.list file with your favourite text editor (e.g. sudo nano /etc/apt/sources.list or gksudo gedit /etc/apt/sources.list) and add the following two lines:
deb http://ppa.launchpad.net/pidgin-developers/ppa/ubuntu jaunty main
deb-src http://ppa.launchpad.net/pidgin-developers/ppa/ubuntu jaunty main
Next, make sure to save the file (Ctrl+O followed by Ctrl+X in Nano) and add the trusted key for this repository:
gpg --keyserver http://keyserver.ubuntu.com --recv-keys A1F196A8
gpg --export A1F196A8 | sudo apt-key add -
Now, update the packages lists:
sudo apt-get update
The next step is to uninstall your currently Pidgin installation:
sudo apt-get remove --purge pidgin
And the next step is just to install Pidgin 2.6.1 from the newly added repositories:
sudo apt-get install pidgin
This should be all.
- several changes and bug fixes in libpurple, the library used by Pidgin for its various chat protocols
- various DNS fixes
- AIM and ICQ fixes
- Gadu-Gadu fixes
- MSN new features, like support for receiving audio clips, support for receiving handwritten messages, many other fixes
- lots of XMPP fixes and improvements, like voice and video support with Jingle or the Service Discovery Browser plugin
- Yahoo! fixes and improvements
- Finch and the Pidgin GTK+ Theme control plugin also received improvements
To install Pidgin 2.6.1 in Ubuntu 9.04 Jaunty Jackalope from the Pidgin developers PPA on Launchpad, just follow the instructions below:
First of all, edit the /etc/apt/sources.list file with your favourite text editor (e.g. sudo nano /etc/apt/sources.list or gksudo gedit /etc/apt/sources.list) and add the following two lines:
deb http://ppa.launchpad.net/pidgin-developers/ppa/ubuntu jaunty main
deb-src http://ppa.launchpad.net/pidgin-developers/ppa/ubuntu jaunty main
Next, make sure to save the file (Ctrl+O followed by Ctrl+X in Nano) and add the trusted key for this repository:
gpg --keyserver http://keyserver.ubuntu.com --recv-keys A1F196A8
gpg --export A1F196A8 | sudo apt-key add -
Now, update the packages lists:
sudo apt-get update
The next step is to uninstall your currently Pidgin installation:
sudo apt-get remove --purge pidgin
And the next step is just to install Pidgin 2.6.1 from the newly added repositories:
sudo apt-get install pidgin
This should be all.
Sunday, 23 August 2009
How-To: Install Simon Speech Recognition Application in Ubuntu 9.04 Jaunty Jackalope
Simon is a very nice KDE4 project with the goal of developing a speech recognition application and it currently works pretty well by letting the user record certain words and execute various commands given via a microphone. Since currently it is not included in the Ubuntu repositories, here are instructions on getting it up and running in Jaunty.
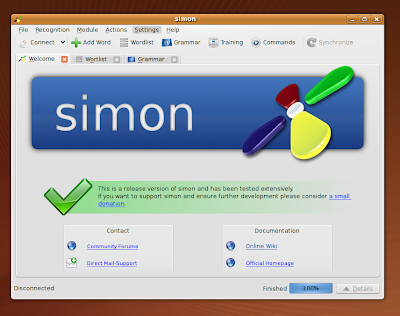
First of all, open up Konsole or GNOME Terminal and install the package flex, needed by simon:
sudo apt-get install flex
Next, download the Ubuntu DEB package from kde-apps.org page and install it as:
sudo dpkg -i simon-0.2-Linux_i386.deb
Or whatever version you downloaded. This should be it, run simon by typing Alt+F2 and typing simon followed by Enter.

First of all, open up Konsole or GNOME Terminal and install the package flex, needed by simon:
sudo apt-get install flex
Next, download the Ubuntu DEB package from kde-apps.org page and install it as:
sudo dpkg -i simon-0.2-Linux_i386.deb
Or whatever version you downloaded. This should be it, run simon by typing Alt+F2 and typing simon followed by Enter.
Saturday, 22 August 2009
How-To: Compile and Install GIMP 2.7.0 in Ubuntu 9.04 Jaunty Jackalope

Ubuntu Jaunty comes by default with GIMP 2.6 included in the repositories, but you can try the latest development version available, which is 2.7.0. This last release is a step forward the next stable GIMP version and contains a lot of user interface improvements and changes, GEGL migration, two new plug-ins to mention the major ones. To compile and install it in Ubuntu, just follow the steps below:
1. Make sure to have the sources repositories enabled
Notice that you can skip this step if you haven't deleted or commented lines out of your /etc/apt/sources.list file.
Edit as root the /etc/apt/sources.list file and make sure to have a line which starts with deb-src, like in the example below (if not, add it and save the file):
deb-src http://ro.archive.ubuntu.com/ubuntu/ karmic-updates main restricted
Again, this should be enabled by default. Next, update the package lists:
sudo apt-get update
2. Install the development libraries
Open a terminal and type:
sudo apt-get build-dep gimp
This command will fetch and install both the development libraries and the build-essential package needed for the compilation.
3. Get the GIMP source tarball
Download the source code from here, make sure the working directory is the one where you saved it and uncompress it:
tar -xjf gimp-2.7.0.tar.bz2
4. Compile and install GIMP
In the gimp-2.7.0 directory, issue the commands:
./configure
make
sudo make install
The last one with your user password. Notice that you can install it as normal user too, by specifying a prefix in your home directory for example and including the bin directory in your $PATH variable:
./configure --prefix=/home/USER/usr
make
make install
No root privileges needed in this case.
Monday, 10 August 2009
How-To: Compile and Install Kaffeine 1.0-pre2 in Kubuntu 9.04 Jaunty Jackalope
Kaffeine is a powerful video player for KDE using the Xine engine, which released a new pre-release for 1.0 yesterday. Version 1.0 will be the first stable port for KDE4, and in the meantime you can try the latest pre-release on your Ubuntu or Kubuntu box by following the next steps.

First, install the necessary dependencies and tools needed by the compilation:
sudo apt-get install cmake build-essential
sudo apt-get install kdelibs5-dev libgettext-ruby-util
First, download the source tarball from the official website (direct link here) and uncompress it:
tar -xzf kaffeine-1.0-pre2.tar.gz
Next, make sure the current working directory is kaffeine-1.0-pre2/ and issue the following commands:
mkdir build
cd build
cmake ..
make
sudo make install
Kaffeine 1.0-pre2 should be now properly installed in /usr/local/bin/kaffeine.

Notice that you can specify another prefix for the installation and install Kaffeine as a normal user. To do that, instead of the commands above, do:
mkdir build
cd build
cmake -DCMAKE_INSTALL_PREFIX=/home/USER/usr/ ..
make
make install
You will have to replace USER with your username, and make sure the path /home/USER/usr/bin is included in your $PATH variable.

First, install the necessary dependencies and tools needed by the compilation:
sudo apt-get install cmake build-essential
sudo apt-get install kdelibs5-dev libgettext-ruby-util
First, download the source tarball from the official website (direct link here) and uncompress it:
tar -xzf kaffeine-1.0-pre2.tar.gz
Next, make sure the current working directory is kaffeine-1.0-pre2/ and issue the following commands:
mkdir build
cd build
cmake ..
make
sudo make install
Kaffeine 1.0-pre2 should be now properly installed in /usr/local/bin/kaffeine.

Notice that you can specify another prefix for the installation and install Kaffeine as a normal user. To do that, instead of the commands above, do:
mkdir build
cd build
cmake -DCMAKE_INSTALL_PREFIX=/home/USER/usr/ ..
make
make install
You will have to replace USER with your username, and make sure the path /home/USER/usr/bin is included in your $PATH variable.
How-To: Install Dillo 2.1.1 in Ubuntu 9.04 Jaunty Jackalope
Dillo is a small, lightweight web browser built using the FLTK GUI toolkit, very low on resources, using its own rendering engine.
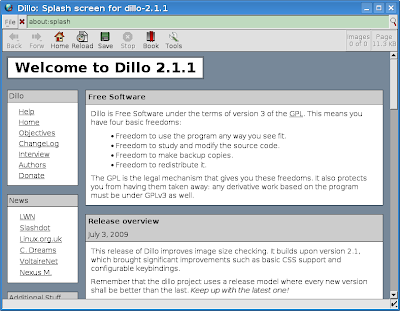
The latest Dillo release is 2.1.1, which you can get in Ubuntu Jaunty easily by adding the Dillo PPA (personal package archives) from Launchpad.net. To do this, edit your /etc/apt/sources.list file using your favourite text editor (e.g. sudo nano /etc/apt/sources.list or gksudo gedit /etc/apt/sources.list) and add the following two lines in it:
deb http://ppa.launchpad.net/d.filoni/dillo/ubuntu jaunty main
deb-src http://ppa.launchpad.net/d.filoni/dillo/ubuntu jaunty main
Next, make sure to save the file (Ctrl+O and Ctrl+X to exit in Nano) and update your package lists:
sudo apt-get update
If you already have an existing, older Dillo installation, you can remove it first:
sudo apt-get remove --purge dillo
Or, if it was installed from a DEB file:
sudo dpkg -r dillo
Then, install Dillo:
sudo apt-get install dillo
This will get the latest Dillo release installed on your Ubuntu system.
Dillo 2.1.1 - fast, lightweight web browser

The latest Dillo release is 2.1.1, which you can get in Ubuntu Jaunty easily by adding the Dillo PPA (personal package archives) from Launchpad.net. To do this, edit your /etc/apt/sources.list file using your favourite text editor (e.g. sudo nano /etc/apt/sources.list or gksudo gedit /etc/apt/sources.list) and add the following two lines in it:
deb http://ppa.launchpad.net/d.filoni/dillo/ubuntu jaunty main
deb-src http://ppa.launchpad.net/d.filoni/dillo/ubuntu jaunty main
Next, make sure to save the file (Ctrl+O and Ctrl+X to exit in Nano) and update your package lists:
sudo apt-get update
If you already have an existing, older Dillo installation, you can remove it first:
sudo apt-get remove --purge dillo
Or, if it was installed from a DEB file:
sudo dpkg -r dillo
Then, install Dillo:
sudo apt-get install dillo
This will get the latest Dillo release installed on your Ubuntu system.
Sunday, 19 July 2009
How-To: Compile and Install Audacious 2.1 in Ubuntu 9.04 Jaunty Jackalope
 Audacious is a GTK music player similar with the older XMMS (X Multimedia System) player. Ubuntu 9.04 ships with Audacious 1.5.1, which is a little old. However, you can easily install and set up the latest Audacious (currently 2.1) following the steps below:
Audacious 2.1 running in Ubuntu 9.04

1. Install the development libraries
Open GNOME-Terminal or Konsole and type:
sudo apt-get build-dep audacious
This command will fetch and install all the development libraries needed by Audacious, including the build-essential meta package which depends on compilation tools.
You will also need to install the libxml++1.0-dev package:
sudo apt-get install libxml++1.0-dev
2. Download the source tarball
Get the source tarball from the Audacious official website (direct link here), save it for example in your home directory and then uncompress it:
tar -xzf audacious-2.1.tgz
3. Compile and install Audacious
First, you can uninstall the current Audacious from repositories (if you have it installed):
sudo apt-get remove audacious
sudo apt-get autoremove
Then, issue the usual commands in the audacious-2.1 directory:
./configure
make
sudo make install
Alternately, you can specify another prefix for the installation, and install Audacious as normal user somewhere inside your home directory. For example:
./configure --prefix=/home/USER/usr
make
make install
Replace USER with your username and make sure the path /home/USER/usr is included in your $PATH environment variable.
At this point, if you run Audacious (using audacious2), the following error may appear: audacious2: unable to launch selected interface skinned
So proceed to the next step and install the plugins.
4. Installing the Audacious plugins
This should be the same as the first part of the tutorial. First, get the development libraries:
sudo apt-get build-dep audacious-plugins
Next, download the source tarball called audacious-plugins-2.1.tgz from the same location (direct link here), uncompress it with tar -xzf audacious-plugins-2.1.tgz, change the current working directory to audacious-plugins-2.1 and issue the usual:
./configure
make
sudo make install
Run audacious as audacious2 (or type Alt+F2 and enter audacious2 in the run box).
Tuesday, 7 July 2009
How-To: Compile and Install VLC 1.0 in Ubuntu 9.04 Jaunty Jackalope

Ubuntu 9.04 (and Kubuntu) comes with VLC 0.9.9 included in the repositories. However, VLC 1.0.0 was released today and it ships with several new features and many improvements. For readers who don't know what VLC means, it is a powerful, cross-platform and open-source video player, built using Qt 4 toolkit. It supports many video formats and comes with advanced video features and functions.
To install the latest release of VLC (currently 1.0.0) in either Ubuntu/Kubuntu/Xubuntu distributions, just follow the steps below:
1. Install the needed dependencies
First, use build-dep to get all the dependencies VLC needs. This will also install compilation tools, including the build-essential meta package:
sudo apt-get build-dep vlc
You will need your user password. Notice that on a fresh system this will install a lot of development packages. After the installation is completed proceed to the next step.
Notice: If the buil-dep command fails with a message which goes like E: Build-dependencies for vlc could not be satisfied. then try to install all the packages manually. The following are two separate commands:
sudo apt-get install build-essential libmad0-dev libavutil49 libavcodec-dev libavformat-dev libavutil-dev libswscale-dev libpostproc-dev liba52-0.7.4-dev
sudo apt-get install debhelper dh-buildinfo gettext quilt nasm yasm libass-dev libxul-dev liba52-0.7.4-dev libaa1-dev libasound2-dev libcaca-dev libcdio-dev libdca-dev libdvbpsi4-dev libaudiofile-dev libavahi-client-dev libavcodec-dev libdvdnav-dev libdvdread-dev libesd0-dev libfaad-dev libflac-dev libfreetype6-dev libfribidi-dev libggi2-dev libgl1-mesa-dev libglib2.0-0 libgnutls-dev libhal-dev libid3tag0-dev libidl0 libimlib2-dev libjack-dev liblircclient-dev liblivemedia-dev liblua5.1-0-dev libmad0-dev libmatroska-dev libmodplug-dev libmpcdec-dev libmpeg2-4-dev libncursesw5-dev libnotify-dev libogg-dev libpng12-dev libpostproc-dev libpulse-dev libqt4-dev libschroedinger-dev libsdl-image1.2-dev libsdl1.2-dev libv4l-dev libvcdinfo-dev libvorbis-dev libx11-dev libx264-dev libxext-dev libxml2-dev libxpm-dev libxt-dev libxv-dev pkg-config qt4-dev-tools zlib1g-dev
This may take a while.
2. Download the source tarball
Get the source code from the official website (direct link), then make sure the currently working directory is the one where you saved it and uncompress it:
tar -xjf vlc-1.0.0.tar.bz2
3. Compile and install VLC
To compile and install, just issue the usual commands inside the vlc-1.0.0 directory:
./configure
make
sudo make install
Finally, don't forget to run sudo ldconfig with your user password.
You can choose an alternate location for the installation, so you can install as normal user. E.g.:
./configure --prefix=/home/user/usr/
make
make install
VLC 1.0.0 running in Kubuntu 9.04

Tuesday, 30 June 2009
How-To: Compile and Install Amarok 2.1.1 in Ubuntu 9.04
Amarok 2.1.1 was released on June 17th and it includes several bug fixes and a few new features compared to 2.1. Among the new features worth mentioning: there is available support for compilations with over 60 artists, there is an option to hide the context view now. For a full list of changes and bug fixes, have a look at the announcement on the official website.
Kubuntu 9.04 ships with 2.0, so to get the latest Amarok you can either use the PPA repository (which can be a little delayed) or compile from source. Here are the steps you need to follow in order to compile 2.1.1 from source:
1. Install the development libraries
In Konsole or GNOME Terminal, type:
sudo apt-get build-dep amarok
This will fetch and install the development packages needed to compile the latest Amarok release. Also, install these packages too:
sudo apt-get install libtag-extras-dev libmysql++-dev libgdk-pixbuf-dev libgtk2.0-dev
2. Get the source tarball
Download the Amarok source tarball from here, then uncompress it:
tar -xjf amarok-2.1.1.tar.bz2
3. Compile and install Amarok
You may need to remove your existing Amarok installation first:
sudo apt-get remove --purge amarok
(Notice that this will erase your entire Amarok settings, scripts, ratings etc. *Skip* this step if you want to keep those!)
rm -rf ~/.kde/share/apps/amarok/
rm ~/.kde/share/config/amarok*
Then, make sure the current working directory is amarok-2.1.1 and type:
cmake -DCMAKE_INSTALL_PREFIX=/usr
make
sudo make install
For the last command you will need to enter your user password. This should be all, just fire up Amarok and 2.1.1 should be running now.
Kubuntu 9.04 ships with 2.0, so to get the latest Amarok you can either use the PPA repository (which can be a little delayed) or compile from source. Here are the steps you need to follow in order to compile 2.1.1 from source:
1. Install the development libraries
In Konsole or GNOME Terminal, type:
sudo apt-get build-dep amarok
This will fetch and install the development packages needed to compile the latest Amarok release. Also, install these packages too:
sudo apt-get install libtag-extras-dev libmysql++-dev libgdk-pixbuf-dev libgtk2.0-dev
2. Get the source tarball
Download the Amarok source tarball from here, then uncompress it:
tar -xjf amarok-2.1.1.tar.bz2
3. Compile and install Amarok
You may need to remove your existing Amarok installation first:
sudo apt-get remove --purge amarok
(Notice that this will erase your entire Amarok settings, scripts, ratings etc. *Skip* this step if you want to keep those!)
rm -rf ~/.kde/share/apps/amarok/
rm ~/.kde/share/config/amarok*
Then, make sure the current working directory is amarok-2.1.1 and type:
cmake -DCMAKE_INSTALL_PREFIX=/usr
make
sudo make install
For the last command you will need to enter your user password. This should be all, just fire up Amarok and 2.1.1 should be running now.
Saturday, 20 June 2009
3 Ways to Install Latest Wine in Ubuntu 9.04 Jaunty Jackalope
I decided to put up this guide which shows how to install the latest Wine release in Ubuntu 9.04 using 3 different methods. The default Jaunty repositories come with Wine 1.0.1, but the latest release is 1.1.24 and a new version is available every two weeks, so here is a tutorial which explains how to get the last Wine release in Ubuntu or Kubuntu Jaunty.
I. Using the Wine PPA
A PPA (Personal Package Archives) is a separate repository which ships newer packages for various applications. You can use a PPA repository for installing newer versions of Amarok, or Wine, or Banshee etc. These repositories are hosted on Launchpad.
In order to get the latest Wine available, you can follow these easy steps:
1. Add the Wine PPA repositories to the /etc/apt/sources.list file
Open the /etc/apt/sources.list file as root with your favourite text editor (e.g. gksudo gedit /etc/apt/sources.list or sudo nano /etc/apt/sources.list) and enter your user password. Then add the following two lines to this file and save it:
deb http://ppa.launchpad.net/ubuntu-wine/ppa/ubuntu jaunty main
deb-src http://ppa.launchpad.net/ubuntu-wine/ppa/ubuntu jaunty main
You can also use Shift+Insert here. Then make sure to save the file and update the sources lists:
sudo apt-get update
After updating, this warning may appear:
W: GPG error: http://ppa.launchpad.net jaunty Release: The following signatures couldn't be verified because the public key is not available: NO_PUBKEY 5A9A06AEF9CB8DB0
W: You may want to run apt-get update to correct these problems
You can either ignore it, or (optionally), install the trusted key for these repositories. In order to get the key, follow the instructions from here. Notice that this is an optional step, so you can skip it or add the key later.
Then, install Wine:
sudo apt-get install wine
Press Y when it asks to install packages from untrusted sources. This should be all, the latest Wine should be now installed (at the time of writing, the version available in this PPA is 1.1.23).
II. Compile and Install Wine from Source
This method needs more time, but this way you get to compile your own version of Wine, without using any additional repositories. Here's what you have to do:
1. Install the needed dependencies and compiling tools
First, make sure you have the sources repositories enabled, that is, a line which starts with deb-src and looks like this:
deb-src http://ro.archive.ubuntu.com/ubuntu/ jaunty universe multiverse
Notice that in Jaunty these are enabled by default, so, unless you deleted this line from the /etc/apt/sources.list file, you don't have to add anything here.
Next, type the following:
sudo apt-get build-dep wine
This command will fetch all the needed development libraries for compiling Wine, including the package build-essential, which is a meta-package consisting of tools needed to compile C/C++ sources like g++.
2. Get the Wine tarball from the official website
Download the Wine source from the official website (direct link here) and uncompress it (e.g. tar -xjf wine-1.1.24.tar.bz2).
3. Compile and install Wine
Make sure the current working directory is wine-1.1.24 (or whatever version you have), and issue the following commands:
./configure
make depend && make
sudo make install
This should be all. Notice that you can also use a different path and install as normal user:
./configure --path=/home/USER/usr
make depend && make
make install
This will install Wine inside the /home/USER/usr directory (replace USER with your username). In this case, make sure /home/USER/usr/bin is added to your $PATH variable, preferable before the other paths.
III. Using the WineHQ Ubuntu repositories
This is yet another method of getting the latest Wine on Ubuntu. It is similar with the first method, but instead of adding a PPA repository we'll add the WineHQ repositories. Follow the steps below:
1. Add the repositories to /etc/apt/sources.list
Add the following repositories to your sources.list file:
deb http://wine.budgetdedicated.com/apt jaunty main
2. Update the sources lists
To update the sources lists use:
sudo apt-get update
With your user password.
3. Install Wine
To install Wine, just type:
sudo apt-get install wine
And this should be all.
I. Using the Wine PPA
A PPA (Personal Package Archives) is a separate repository which ships newer packages for various applications. You can use a PPA repository for installing newer versions of Amarok, or Wine, or Banshee etc. These repositories are hosted on Launchpad.
In order to get the latest Wine available, you can follow these easy steps:
1. Add the Wine PPA repositories to the /etc/apt/sources.list file
Open the /etc/apt/sources.list file as root with your favourite text editor (e.g. gksudo gedit /etc/apt/sources.list or sudo nano /etc/apt/sources.list) and enter your user password. Then add the following two lines to this file and save it:
deb http://ppa.launchpad.net/ubuntu-wine/ppa/ubuntu jaunty main
deb-src http://ppa.launchpad.net/ubuntu-wine/ppa/ubuntu jaunty main
You can also use Shift+Insert here. Then make sure to save the file and update the sources lists:
sudo apt-get update
After updating, this warning may appear:
W: GPG error: http://ppa.launchpad.net jaunty Release: The following signatures couldn't be verified because the public key is not available: NO_PUBKEY 5A9A06AEF9CB8DB0
W: You may want to run apt-get update to correct these problems
You can either ignore it, or (optionally), install the trusted key for these repositories. In order to get the key, follow the instructions from here. Notice that this is an optional step, so you can skip it or add the key later.
Then, install Wine:
sudo apt-get install wine
Press Y when it asks to install packages from untrusted sources. This should be all, the latest Wine should be now installed (at the time of writing, the version available in this PPA is 1.1.23).
II. Compile and Install Wine from Source
This method needs more time, but this way you get to compile your own version of Wine, without using any additional repositories. Here's what you have to do:
1. Install the needed dependencies and compiling tools
First, make sure you have the sources repositories enabled, that is, a line which starts with deb-src and looks like this:
deb-src http://ro.archive.ubuntu.com/ubuntu/ jaunty universe multiverse
Notice that in Jaunty these are enabled by default, so, unless you deleted this line from the /etc/apt/sources.list file, you don't have to add anything here.
Next, type the following:
sudo apt-get build-dep wine
This command will fetch all the needed development libraries for compiling Wine, including the package build-essential, which is a meta-package consisting of tools needed to compile C/C++ sources like g++.
2. Get the Wine tarball from the official website
Download the Wine source from the official website (direct link here) and uncompress it (e.g. tar -xjf wine-1.1.24.tar.bz2).
3. Compile and install Wine
Make sure the current working directory is wine-1.1.24 (or whatever version you have), and issue the following commands:
./configure
make depend && make
sudo make install
This should be all. Notice that you can also use a different path and install as normal user:
./configure --path=/home/USER/usr
make depend && make
make install
This will install Wine inside the /home/USER/usr directory (replace USER with your username). In this case, make sure /home/USER/usr/bin is added to your $PATH variable, preferable before the other paths.
III. Using the WineHQ Ubuntu repositories
This is yet another method of getting the latest Wine on Ubuntu. It is similar with the first method, but instead of adding a PPA repository we'll add the WineHQ repositories. Follow the steps below:
1. Add the repositories to /etc/apt/sources.list
Add the following repositories to your sources.list file:
deb http://wine.budgetdedicated.com/apt jaunty main
2. Update the sources lists
To update the sources lists use:
sudo apt-get update
With your user password.
3. Install Wine
To install Wine, just type:
sudo apt-get install wine
And this should be all.
Friday, 24 April 2009
Kubuntu 9.04 Jaunty Jackalope Overview & Screenshots
Ubuntu 9.04, codenamed Jaunty Jackalope, was released on April 23rd, also celebrating the 10th Ubuntu release. Since its first version back in October 2004, Ubuntu went through many improvements and quickly became one of the most popular distributions out there, with a huge and continuously thriving community and a fast development method. Free CDs through the ShipIt service can be also ordered, which is another way from which users can benefit of Ubuntu and spread it.
Ubuntu is based on Debian, one of the oldest distributions out there, well-known for its highly stable releases, but it delivers the latest versions of applications with each release and offers a more polished desktop. Many other projects were born based on Ubuntu, including Kubuntu (which is practically Ubuntu using KDE instead of GNOME), Edubuntu (for educational purposes), or Xubuntu (using the Xfce desktop environment).
In this article I'll overview Kubuntu 9.04, which comes with KDE 4.2.2, bleeding-edge software like OpenOffice.org 3.0.1 and Amarok 2.0.2.

First of all, Kubuntu was always known as Ubuntu's little brother, since it was based on KDE and opinions were always different regarding its stability. Some say Kubuntu was always a buggy distribution, and probably the worst KDE-based distribution out there, while for others it works very well. Since Kubuntu shares the same repositories with Ubuntu and the KDE packages come from Debian Sid (the unstable Debian repositories), this can be understandable, especially that usually the Ubuntu community focuses on GNOME.
Although I already had Kubuntu 9.04 Beta installed on a separate partition, I decided to download the final release and install it on a clean partition instead of apt-get dist-upgrading. Anyway, here's what the brand, new and shiny Kubuntu 9.04 Jaunty has to offer...
I took the following screenshots at 1280x1024, with the nVIDIA 180.29 driver on a GeForce FX 7600GS graphics card.
As usual, I noticed incompatibilities between KDE's desktop settings and nVIDIA driver, but they seem to go away after using nvidia-settings utility to set resolution and save settings to the /etc/X11/xorg.conf.
I made a full review of Amarok 2.0.2 on Kubuntu here, and although I found it buggy and lacking features, 2.1 promises great improvements.

There was a problem after ticking the 'Ctrl+Alt+Backspace restarts the xserver' check box in System Settings' Display tab (it didn't restart the X Server), but it went away after setting the resolution through the nvidia-settings tool.


I could notice Dolphin will eat 100% CPU and practically freezes the system when moving the mouse over a Quick Time .MOV file (I guess that's because codecs are not installed, but nevertheless, this should be fixed).

I liked to see KDE 4.2 is much faster than how it was in Kubuntu 8.10. Great transparency effects, wobbly windows, animated minimise/maximise of windows are just a few of the wonderful desktop effects KDE has to offer.
Overall, Kubuntu 9.04 seemed, at least to me, buggy as usual. The pppoeconf utility does not seem to work, despite the fact that the Internet connection works flawless in Debian; (update: this proved to be actually a problem with the ISP),there are still some problems with fonts when changing resolution (this is probably a KDE issue, since it's been there for years, KDE3 too). But still, with a little tweaking, Jaunty can offer a good KDE 4.2 experience and bleeding-edge applications.
Ubuntu is based on Debian, one of the oldest distributions out there, well-known for its highly stable releases, but it delivers the latest versions of applications with each release and offers a more polished desktop. Many other projects were born based on Ubuntu, including Kubuntu (which is practically Ubuntu using KDE instead of GNOME), Edubuntu (for educational purposes), or Xubuntu (using the Xfce desktop environment).
In this article I'll overview Kubuntu 9.04, which comes with KDE 4.2.2, bleeding-edge software like OpenOffice.org 3.0.1 and Amarok 2.0.2.
Typical Kubuntu 9.04 desktop with default wallpaper

First of all, Kubuntu was always known as Ubuntu's little brother, since it was based on KDE and opinions were always different regarding its stability. Some say Kubuntu was always a buggy distribution, and probably the worst KDE-based distribution out there, while for others it works very well. Since Kubuntu shares the same repositories with Ubuntu and the KDE packages come from Debian Sid (the unstable Debian repositories), this can be understandable, especially that usually the Ubuntu community focuses on GNOME.
Although I already had Kubuntu 9.04 Beta installed on a separate partition, I decided to download the final release and install it on a clean partition instead of apt-get dist-upgrading. Anyway, here's what the brand, new and shiny Kubuntu 9.04 Jaunty has to offer...
I took the following screenshots at 1280x1024, with the nVIDIA 180.29 driver on a GeForce FX 7600GS graphics card.
As usual, I noticed incompatibilities between KDE's desktop settings and nVIDIA driver, but they seem to go away after using nvidia-settings utility to set resolution and save settings to the /etc/X11/xorg.conf.
I made a full review of Amarok 2.0.2 on Kubuntu here, and although I found it buggy and lacking features, 2.1 promises great improvements.
Amarok 2.0.2 - currently pretty buggy

There was a problem after ticking the 'Ctrl+Alt+Backspace restarts the xserver' check box in System Settings' Display tab (it didn't restart the X Server), but it went away after setting the resolution through the nvidia-settings tool.
System Settings

Kontact, Kopete and KTorrent

Konqueror

KMenu

Dragon Player

I could notice Dolphin will eat 100% CPU and practically freezes the system when moving the mouse over a Quick Time .MOV file (I guess that's because codecs are not installed, but nevertheless, this should be fixed).
Dolphin

I liked to see KDE 4.2 is much faster than how it was in Kubuntu 8.10. Great transparency effects, wobbly windows, animated minimise/maximise of windows are just a few of the wonderful desktop effects KDE has to offer.
Overall, Kubuntu 9.04 seemed, at least to me, buggy as usual. The pppoeconf utility does not seem to work, despite the fact that the Internet connection works flawless in Debian; (update: this proved to be actually a problem with the ISP),there are still some problems with fonts when changing resolution (this is probably a KDE issue, since it's been there for years, KDE3 too). But still, with a little tweaking, Jaunty can offer a good KDE 4.2 experience and bleeding-edge applications.
Sunday, 29 March 2009
10 Essential Applications Included in Kubuntu 9.04 Jaunty Jackalope
While I agree that there are applications for KDE 4.2 which still lack several important features (like for example the equalizer and ability to go to the previous/next song using the tag editor in Amarok), I must say that it also improved very much since the last time I had a look at it. It is definitely faster, the desktop looks nicer, it does not seem a beta environment any more. Overall, the improvements in KDE 4 are really visible and I'm glad for that from a user's point of view. The only drawback is that (at least on my system - an Intel Core 2 Duo 1.8 GHz, 1 GB DDRAM2 and GeForce FX 7600GS) I had to disable desktop effects (OpenGL support) when playing Unreal Tournament 2004. The nVIDIA driver I used was the last one from the official website (180.29). I also tried the ones included in the repositories (all 4 versions of the packaged nvidia-glx) but this one seemed to work best for me. I'll give it another go when Jaunty will be stable and eventually make a full review.
Back to the main topic of this article. I will briefly review no less than ten applications which are included by default on the Kubuntu 9.04 CD. The Kubuntu team released the first Jaunty Jackalope beta on March 26, so after installing it on a separate 10 GB partition (my other system is Debian Lenny) I performed a sudo apt-get update && sudo apt-get dist-upgrade to make sure the last updates were included. Kubuntu 9.04 comes with KDE 4.2.1, Amarok 2.0.2 and OpenOffice 3.0.1 as an office suite (still no inclusion of KOffice).
Music player: Amarok 2.0.2
This is the KDE 4 port of the famous Amarok audio player. It has some issues with scanning the music collection, but it's usable overall. It comes with a lot of features, including a powerful collection manager, cover manager, support for services like Last.fm and Jamendo. One of the great features introduced in Amarok 2.x was the widget support, which allows you to embed lyrics, song info and many more in the central area of the player.
Official website

Movie player: Dragon Player 2.0
Although not as powerful as players like SMPlayer or Kaffeine, Dragon Player (formerly known as Codeine) will play all the popular video formats (including Matroska MKV) and DVDs. It is a small, basic player with support for subtitles but not any other options.
Official website

Web browser: Konqueror 4.2.1
This is the port of the famous and default file manager, viewer and web browser in KDE3. Currently it still has some issues, especially crashes when pressing some web buttons or filling in forms. For example, I couldn't write a Blogspot post using Konqueror. Still, it is the default web browser which ships with KDE 4 and implicitly Kubuntu Jaunty and I hope it will be fixed in the versions to come.
Official website

File manager: Dolphin 1.2.1
Praised by some and highly criticised by others, Dolphin is now the default file manager in KDE 4. Although there are many (including me) which prefer to use Konqueror as the file manager, Dolphin has a nice clean interface and it's pretty simple and intuitive to use.
Official website


CD/DVD burner: K3b 1.0.5
Probably the most loved and the most complete burning application available for Linux, K3b still is at version 1.0.5 for KDE3, which will make it look a little ugly compared to the way KDE 4 applications look now. Although Kubuntu 9.04 will come with this K3b version, the official maintainer of this wonderful application started working at a KDE 4 port for it.
Official website

BitTorrent client: KTorrent 3.2.0
Together with clients like Azureus or Deluge, KTorrent was always one of the top BitTorrent clients available for Linux, and definitely the number one choice for KDE users. It's just feature-complete, it has support for plugins and the default ones are more than enough, you can download many torrents at one time without any problems, it can download only specific files from inside a torrent, you can search for torrents directly from within KTorrent and many, many more.
Official website

IM client: Kopete 0.70.0
Kopete hasn't changed much compared to its KDE 3 counterpart. It currently has no more features, it's just the same old client ported to KDE 4 with a changed interface here and there. It supports many networks like Yahoo, AIM, ICQ, Jabber and WLM.
Official website

Image viewer: Gwenview 2.2.0
Gwenview was always my default image viewer of choice. It is powerful enough, well-designed, with a clean interface and all the options one needs from an image viewing application. It also comes with a bunch of plugins which will turn out quite useful for basic image manipulation.
Official website


IRC client: Quassel 0.4.1
Quassel is an IRC client which is new to me, and I've never used it before. Since the Konversation port to KDE 4 is yet to be complete as far as I know, Kubuntu includes this one. It's a basic client with no scripting support, but it includes enough configuration options to make it useful for getting on IRC. Those who never bothered making various plugins or customising their IRC client using event-based scripting will be fine with Quassel. There are, however, some problems with Quassel. I couldn't change the chat window font and it doesn't seem to remember the size of the nicklist.
Official website

Terminal application: Konsole 2.2.1
I couldn't exclude a terminal application from an 'essential applications' list in Linux. Konsole is the default shell in KDE and it supports configurable profiles (together with font sizes and colours).
Official website

Together with those there are also included OpenOffice 3.0.1 as the office suite, Okular, which is the universal document viewer in KDE 4, and KOrganizer.
Back to the main topic of this article. I will briefly review no less than ten applications which are included by default on the Kubuntu 9.04 CD. The Kubuntu team released the first Jaunty Jackalope beta on March 26, so after installing it on a separate 10 GB partition (my other system is Debian Lenny) I performed a sudo apt-get update && sudo apt-get dist-upgrade to make sure the last updates were included. Kubuntu 9.04 comes with KDE 4.2.1, Amarok 2.0.2 and OpenOffice 3.0.1 as an office suite (still no inclusion of KOffice).
Music player: Amarok 2.0.2
This is the KDE 4 port of the famous Amarok audio player. It has some issues with scanning the music collection, but it's usable overall. It comes with a lot of features, including a powerful collection manager, cover manager, support for services like Last.fm and Jamendo. One of the great features introduced in Amarok 2.x was the widget support, which allows you to embed lyrics, song info and many more in the central area of the player.
Official website

Movie player: Dragon Player 2.0
Although not as powerful as players like SMPlayer or Kaffeine, Dragon Player (formerly known as Codeine) will play all the popular video formats (including Matroska MKV) and DVDs. It is a small, basic player with support for subtitles but not any other options.
Official website

Web browser: Konqueror 4.2.1
This is the port of the famous and default file manager, viewer and web browser in KDE3. Currently it still has some issues, especially crashes when pressing some web buttons or filling in forms. For example, I couldn't write a Blogspot post using Konqueror. Still, it is the default web browser which ships with KDE 4 and implicitly Kubuntu Jaunty and I hope it will be fixed in the versions to come.
Official website

File manager: Dolphin 1.2.1
Praised by some and highly criticised by others, Dolphin is now the default file manager in KDE 4. Although there are many (including me) which prefer to use Konqueror as the file manager, Dolphin has a nice clean interface and it's pretty simple and intuitive to use.
Official website


CD/DVD burner: K3b 1.0.5
Probably the most loved and the most complete burning application available for Linux, K3b still is at version 1.0.5 for KDE3, which will make it look a little ugly compared to the way KDE 4 applications look now. Although Kubuntu 9.04 will come with this K3b version, the official maintainer of this wonderful application started working at a KDE 4 port for it.
Official website

BitTorrent client: KTorrent 3.2.0
Together with clients like Azureus or Deluge, KTorrent was always one of the top BitTorrent clients available for Linux, and definitely the number one choice for KDE users. It's just feature-complete, it has support for plugins and the default ones are more than enough, you can download many torrents at one time without any problems, it can download only specific files from inside a torrent, you can search for torrents directly from within KTorrent and many, many more.
Official website

IM client: Kopete 0.70.0
Kopete hasn't changed much compared to its KDE 3 counterpart. It currently has no more features, it's just the same old client ported to KDE 4 with a changed interface here and there. It supports many networks like Yahoo, AIM, ICQ, Jabber and WLM.
Official website

Image viewer: Gwenview 2.2.0
Gwenview was always my default image viewer of choice. It is powerful enough, well-designed, with a clean interface and all the options one needs from an image viewing application. It also comes with a bunch of plugins which will turn out quite useful for basic image manipulation.
Official website


IRC client: Quassel 0.4.1
Quassel is an IRC client which is new to me, and I've never used it before. Since the Konversation port to KDE 4 is yet to be complete as far as I know, Kubuntu includes this one. It's a basic client with no scripting support, but it includes enough configuration options to make it useful for getting on IRC. Those who never bothered making various plugins or customising their IRC client using event-based scripting will be fine with Quassel. There are, however, some problems with Quassel. I couldn't change the chat window font and it doesn't seem to remember the size of the nicklist.
Official website

Terminal application: Konsole 2.2.1
I couldn't exclude a terminal application from an 'essential applications' list in Linux. Konsole is the default shell in KDE and it supports configurable profiles (together with font sizes and colours).
Official website

Together with those there are also included OpenOffice 3.0.1 as the office suite, Okular, which is the universal document viewer in KDE 4, and KOrganizer.
Subscribe to:
Posts (Atom)